
Invite users
Main → Settings → Users
Inventory is teamwork: someone receives goods, someone sells, someone counts. In StoDo Online you add people as users of your database — each with their own sign-in, a permission profile, and their own slice of your stores.
-
Open Settings → Users and tap +.
-
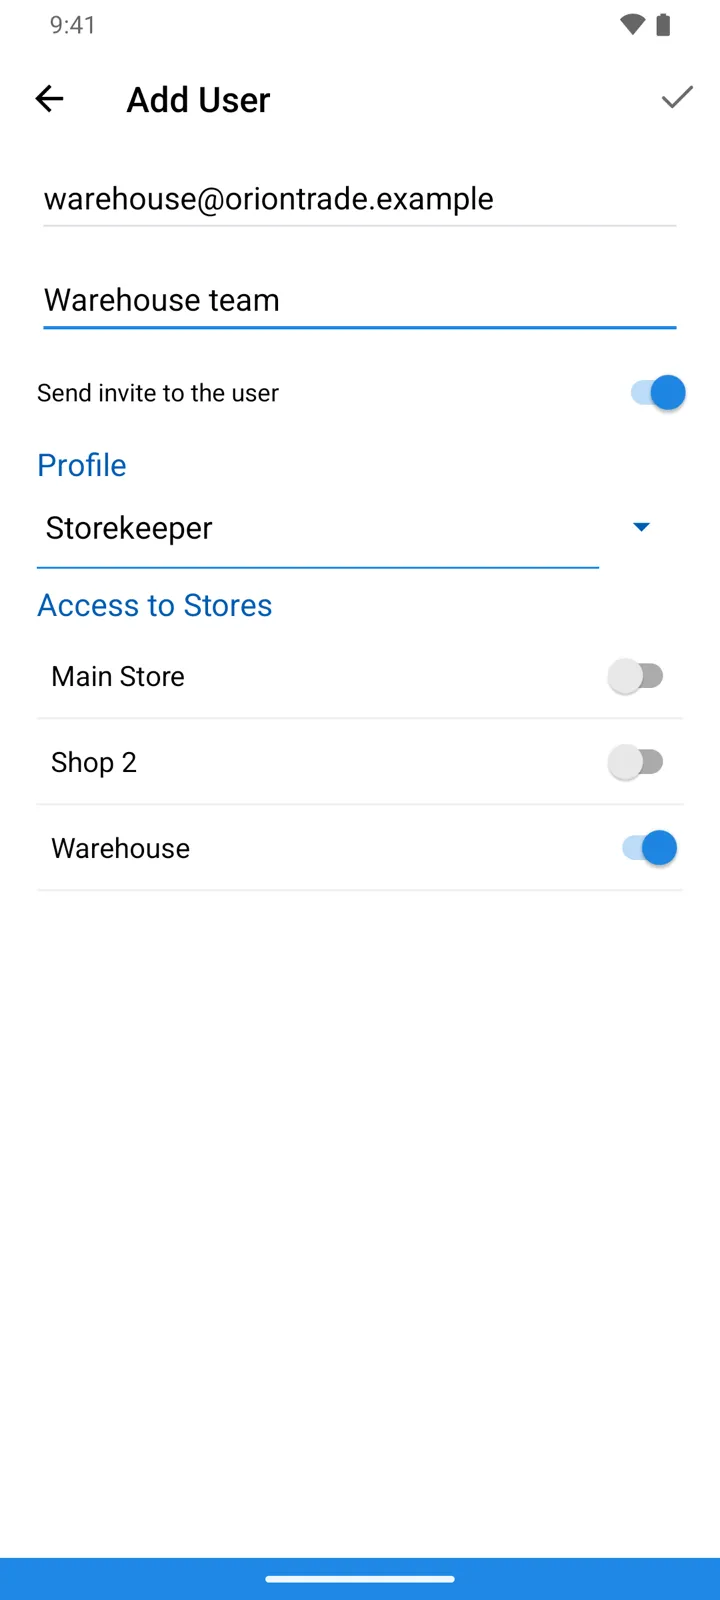
Fill in the user’s card: User’s e-mail - Google account — the exact Google address they will sign in with — and a Username. Leave Send invite to the user on and the app sends them an e-mail: “You are invited to use my database. To get access download the application at…”.
-
Decide what they can do. Pick a Profile — the set of permissions they work under — and tick their Access to Stores: a user sees only the stores you open to them.
-
Their side is short: install StoDo Online and sign in with that same Google account. Your database appears in their Databases list — they switch to it and are working in your data, within the limits you set.
Good to know
Section titled “Good to know”- User seats come with your subscription plan — each plan includes a number of users. One over the limit and the app says so: “You have exceeded maximum number of users. To add more users you need an appropriate subscription. Continue?” — leading straight to the subscription screen.
- Invited users don’t pay: the seats are part of the owner’s subscription.
- The e-mail must match their Google account exactly — the invitation message is just a courtesy; it’s the user card that grants access. The Send invite to the user switch exists only while adding a user: an existing card doesn’t offer it, so there’s no re-send later.
- If they sign in and see “You don’t have access to any Store…”, you’ve added the user but ticked no store — open Access to Stores on their card.
- Deleting a user (“Delete this user?”) removes their access, not your data — everything they entered stays in the database.